This tutorial is going to cover how to set up the WiringPi library to enable you to use the GPIO on your Raspberry Pi in C. If you are looking for something more advanced than a blinky program, then make sure you check back as this tutorial is only the first in a long series.
The first set is to remote into your Raspberry Pi (you don’t have to do this you can use a normal set-up). Then download git if you haven’t already:
sudo apt-get install git-coreThen you download and install the library using git:
git clone https://github.com/WiringPi/WiringPi.gitcd WiringPi./buildThen we are ready to code! Create a new file called blinky.c and use the following code:
#include <stdio.h>
#include <wiringPi.h>

const int ledPin = 17;

int main(){
    wiringPiSetupGpio(); // Initialise WiringPi with Broadcom GPIO pins

    pinMode(ledPin, OUTPUT); // Set LED Pin as an output

    while(1){
        // Turn LED On
        printf("LED On\n");
        digitalWrite(ledPin, HIGH);

        delay(1000);

        // Turn LED off
        printf("LED Off\n");
        digitalWrite(ledPin, LOW);

        delay(1000);
    }

    return 0;

}
Then to build the code, use ctrl+shift+B and then press the cog button next to build active task. This will open the tasks.json file. Your tasks.json file should look like this (note the “args” section):
{
"version": "2.0.0",
"tasks": [
{
"type": "cppbuild",
"label": "C/C++: gcc build active file",
"command": "/usr/bin/gcc",
"args": [
"-fdiagnostics-color=always",
"-g",
"${file}",
"-o",
"${fileDirname}/${fileBasenameNoExtension}",
"-l",
"wiringPi"
],
"options": {
"cwd": "${fileDirname}"
},
"problemMatcher": [
"$gcc"
],
"group": "build",
"detail": "compiler: /usr/bin/gcc"
}
]
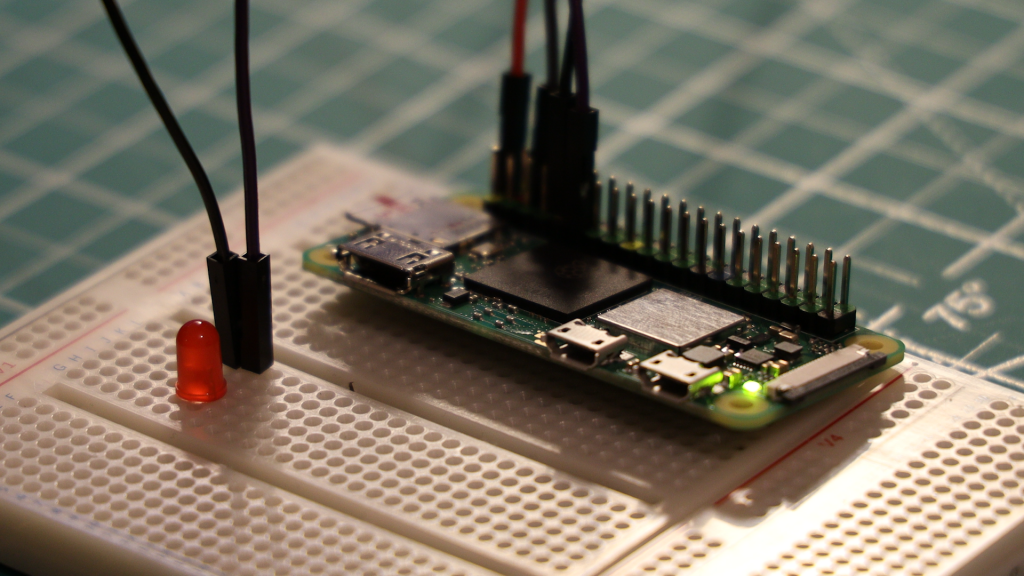
}The Raspberry Pi Zero 2 W was connected to the LED as shown in the diagram below.

Now you can run your program! In the terminal type:
./blinkyAnd now you should see the LED blinking on and off!
It worked perfectly as you instructed. I have an application running on a Raspberry Pi Zero, and wanted to try some new stuff on the Zero 2 W. First thing I found was that it needed the wiring .so and it’s not there. Found your web site and followed the procedure (took less than ten minutes).
Bottom line:
Taa-daa!
Thanks and Best regards,
Dave
Thats looks like Arduino ‘c’? Have a look at go (golang). Nice modern c equivalent. Still glad it’s not python lol
Nice articles, try and explain what you’re doing as well.
Does this work only for Pi Zero W2 or all Pis running 64 bit Raspberry OSes?