Do you want to have the “Hey Google” or “Alexa” key work functionality without sending your information outside of your home network? Well look no further than this tutorial where we explain how to create an offline keyword spotter using the Photon 2 development board and Edge Impulse to train a machine learning model to detect, and act upon, you saying a key word!
In this tutorial, I will program the Photon 2 development board with a trained machine learning model to detect the keyword “Photon” and then send an MQTT message to my local Home Assistant Green. This then triggers an action to toggle a Zigbee smart switch and turn a lamp on and off.
This article was sponsored by Particle and their Photon 2 development board. Learn more and get your Photon 2 here. Learn Embedded Systems readers get 20% off at the Particle store with code LEARNEMBEDDED.
What Will You Need?
To follow along with this tutorial you will need:
- Particle Photon 2
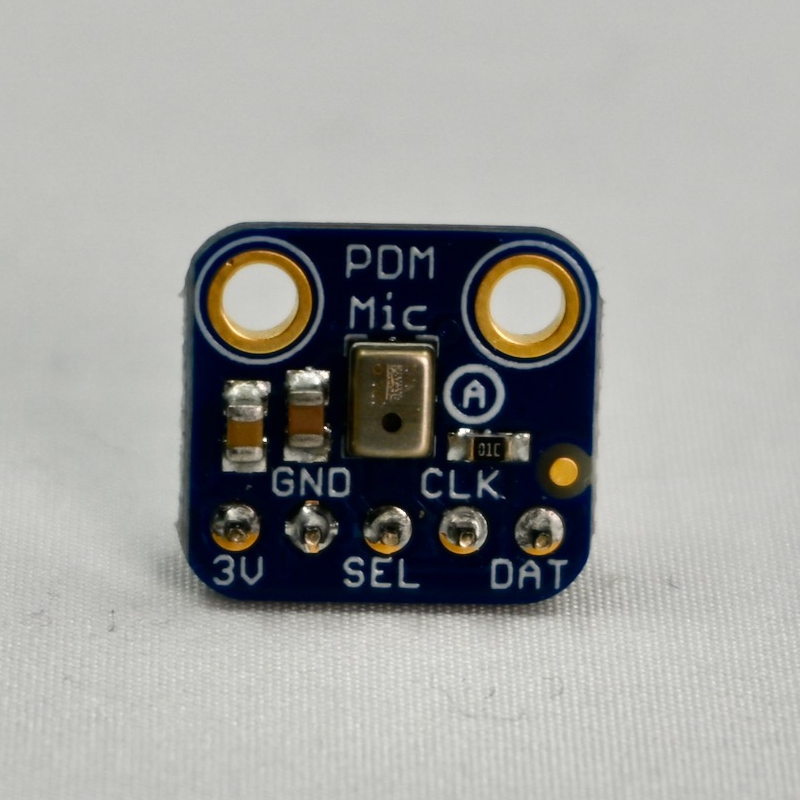
- PDM Microphone (I used the one from Particle’s Edge ML Kit)
- Breadboard (any size will do) & Jumper Cables
- Micro USB to USB Cable
- Some form of Home Assistant running and smart switch or similar (for the smart home functionality)
Wiring Table for PDM Mic
Wire the PDM breakout board to your Photon 2 using the following connections:
| Photon 2 | PDM Mic |
| 3V3 | 3V |
| GND | GND |
| A0 | CLK |
| A1 | DAT |
Edge Impulse
In order to train our model, we need to use Edge Impulse. Head to Edge Impulse here and create an account. Once in your account, create a new project and name it whatever you like! If you would like to keep this project private, then make sure to select private instead of public.
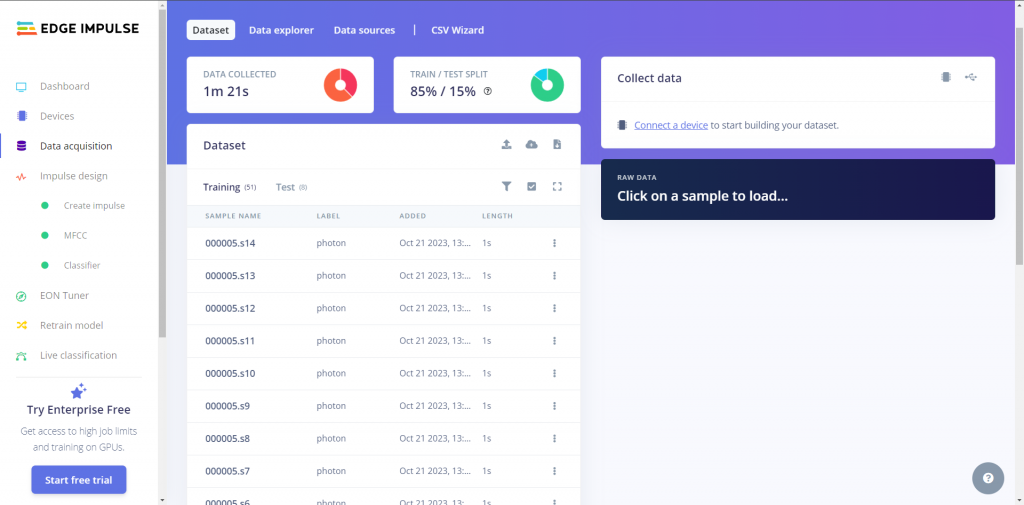
Once you have created your project, head to data acquisition then select “Add Data”. Here you can upload audio clips of you saying your keyword, I used “Photon” as mine. You can record this via your phone or a similar device. When uploading, make sure to label your audio as the keyword. Then upload some background noise and label this background or “unknown”.
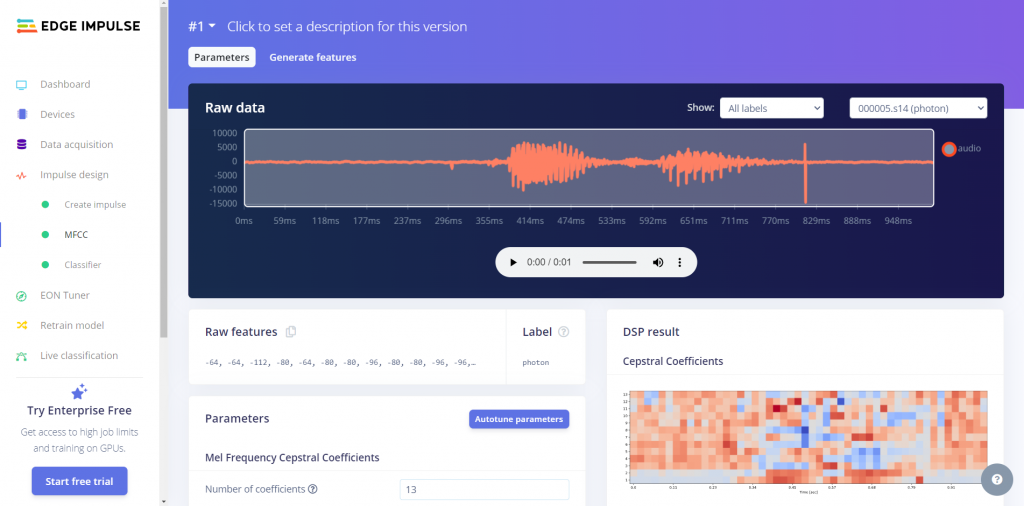
Once you have training data, we can begin to design the Impulse. In the input block, select time series data. The default settings here are fine. Then in the processing block, use MFCC. This is recommended for detecting voice. Then we need to use a “Classification” learning block to distinguish between the two labels of “keyword” and “Unknown”.
In the MFCC section, keep the default settings and hit “Generate features”. This will analyse the features in each of the recordings that you uploaded. This may take some time.
In the classifier section, again keep the default settings and then start training. This will use the results of the MFCC block to learn the differences between your keyword and other background noise. Once complete, you can test your model by uploading some more example audio files to test against your model. If you want to do this, follow the instructions in the “Model testing” section.
Development Board Firmware
Now to deploy this model to your Photon 2, you need to go to the deployment section the find “Particle library”. Hit build and it will download a library of your model. I would recommend using the EON compiler to reduce the memory use of your model. You can open this model in the Particle Workbench. Open the main.cpp file in Project > src, but copy the main.cpp file from: Project > examples > particle_microphone_continuous project. This project will allow you to classify the input from the microphone on the fly.
Once you have opened the example program in VSCode, you can begin to add your code to this project.
Source code
For brevity, I will not paste the whole file here, only the functions that have changed. To begin with, I made sure to include the MQTT particle library. Then in the function declarations, I added the following (replace the X’s with the actual IP of your MQTT broker):
const uint8_t ip[] = {XXX,XXX,X,XXX}; // MQTT server IP
MQTT client(ip, 1883, callback, true);
In the main loop function, we add the following to the end. This is essentially a “keep alive” function to ensure we can reach the MQTT broker, and reconnect if not. This code also allows you to receive and action MQTT commands.
    if (client.isConnected()){
		// This will check for a message if you are subscribed to a topic and then run the callback
        client.loop();
	}
	else{
		client.connect("test", "mqtt", "test");
	}
Then in the print_inference_result function, we edit the lines directly after the comment “Print the prediction results (classification)” like so:
    // Print the prediction results (classification)
#else
    ei_printf("Predictions:\r\n");
    for (uint16_t i = 0; i < EI_CLASSIFIER_LABEL_COUNT; i++) {
        ei_printf("  %s: ", ei_classifier_inferencing_categories[i]);
        ei_printf("%.5f\r\n", result.classification[i].value);

        if(strstr(ei_classifier_inferencing_categories[i], "photon") && result.classification[i].value > 0.75){
            ei_printf("KEYWORD DETECTED, SENDING MQTT MESSAGE\n");
            if (client.isConnected()) {
			// Send triggered message
        	    client.publish("home/sensors/office/lamp","1");
			    ei_printf("Sent Message to MQTT");
    	}else{
            ei_printf("ERROR NOT CONNECTED TO SERVER\n");
        }
        }
    }
#endif
Home assistant
To enable the smart switch controlling my lamp to toggle on or off, I used my Home Assistant Green, but any Home Assistant installation should do! I installed the Mosquitto broker add on by:
- Navigating to Settings -> Add-ons -> Add-on store.
- Find the “Mosquitto broker” add-on and click it.
- Click on the “INSTALL” button.
Once installed, I made sure that the IP address of the MQTT server in the project source code matches that of the IP address of the Home Assistant MQTT server.
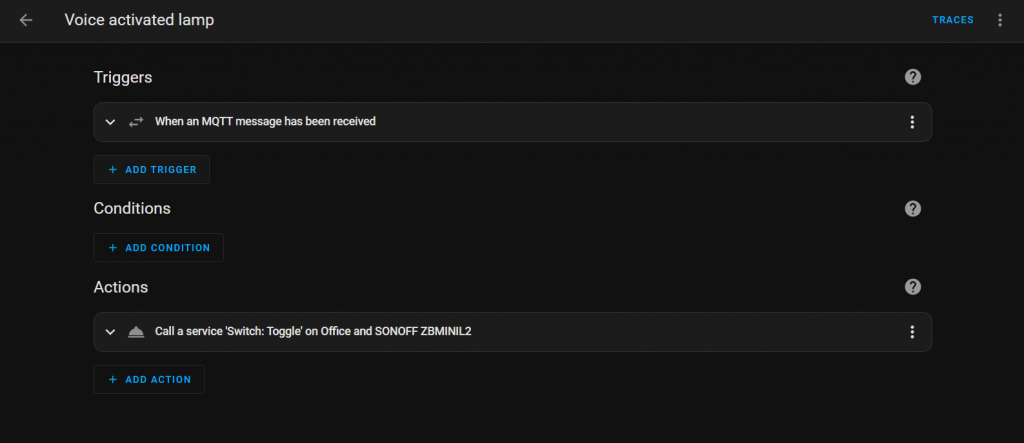
Then I created an action to trigger the smart switch on receipt of an MQTT message on the topic “/home/office/lamp”.
Building & Flashing
Once you have finished writing your code, you can build this program and upload it to your Photon 2. You can only use the local compile and flash functionality for this project. Once uploaded to your Photon 2, you can have a go at triggering your Home Assistant action!
Conclusion
With the Photon 2 flashed with your code, you should be able to trigger your smart switch (or other Home Assistant action) with a simply mutter of your Keyword!
If you are interested in getting yourself a Photon 2 you can pick one up here. Remember, Learn Embedded Systems readers get 20% off at the Particle store with code LEARNEMBEDDED.
Troubleshooting Build Problems
Below are a couple of the problems trying to build this program, and it seems like some others online had the same difficulties. Try the below solutions.
Argument list too long
On Windows, you can sometimes come across the “Argument list too long”. This can be solved by following the tutorial here, under the heading “Building using Docker”.
PSRAM overflowed by 4 bytes
As per “Arjan” from forum.edgeimpulse.com, you can resolve this error by adjusting the build linker script in your Particle SDK directory. Located somewhere like:
~/.particle/toolchains/deviceOS/5.3.2/modules/shared/rtl872x/build_linker_script.mk
Replace lines 38 and 39 with following lines:
USER_SRAM_LENGTH = ( $(DATA_SECTION_LEN) + $(BSS_SECTION_LEN) + 20 )
USER_PSRAM_LENGTH = ( $(PSRAM_TEXT_SECTION_LEN) + $(PSRAM_DATA_SECTION_LEN) + $(PSRAM_BSS_SECTION_LEN) + 20)