In this tutorial, we will create an IoT connected motion sensor alarm that you can use to alert you via a telegram message that a sensor has been tripped. You can also extend this project to introduce an audible alarm if you wanted to make this a little less covert! We are going to make use of the amazing Photon 2 development board from Particle and their free Particle Cloud which is great for IoT applications.
This article was sponsored by Particle and their Photon 2 development board. Learn more and get your Photon 2 here. Learn Embedded Systems readers get 20% off at the Particle store with code LEARNEMBEDDED.
What Will You Need?
To follow along with this tutorial you will need:
- Particle Photon 2
- PIR Motion Sensor (I used the one from Particle’s Edge ML Kit)
- Breadboard (any size will do) & Jumper Cables
- Micro USB to USB Cable
- Raspberry Pi IoT Server (Tutorial Here)
For the optional extra of playing sound from the Photon 2, you will need the above as well as the following:
- FeatherWing Doubler
- Adafruit Music Maker FeatherWing
- 4 Ohm Speaker(s)
- Speaker Wire
Basic Monitoring Alarm
Wiring
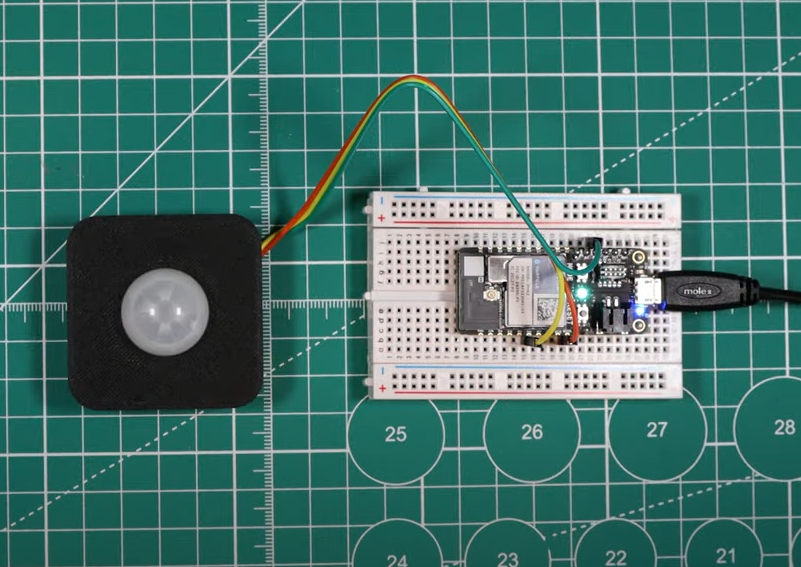
Wire your Photon 2 up to the PIR Motion sensor with the following connections:
| Photon 2 | PIR Sensor |
| VUSB | 5V |
| GND | GND |
| D6 (Any “D” pin will do) | OUT |
The PIR motion sensor will only work with a 5V supply of power. So don’t connect it to a 3v3 pin. The USB supply to the Photon 2 is 5V.
3D Printed Case
In the video showcase, I house the PIR motion sensor in a 3D printed housing. I used this one from Thingiverse user Stanojoski. I printed this on an Ender 3 printer. There are plenty of other models on Thingiverse which would allow you to store the Photon 2 inside the case. I chose not to do this for this example as I wanted a smaller case to hide the sensor better.
Photon 2 Code Breakdown
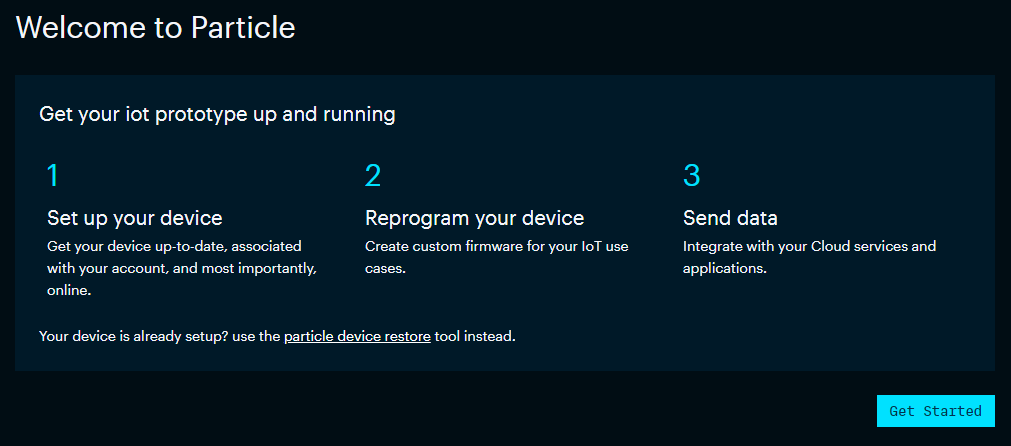
The code running onboard the Photon 2 is very straightforward. But before we get to that make sure that your Photon 2 is set-up with Device OS and is connected to your WiFi network.
If you haven’t set-up your Photon 2, ensure your Photon 2 is connected to your computer over USB and simply head to https://setup.particle.io/?family=photon&device=photon and follow the instructions.
You can find the full code below, feel free to copy/paste and scroll ahead but we will explain it in a bit more detail below.
const pin_t sensor_pin = D6;

SYSTEM_THREAD(ENABLED);

void setup()
{
	pinMode(sensor_pin, INPUT);
  	pinMode(sensor_pin, INPUT_PULLDOWN);
}

void loop()
{
	delay(2s);
	if(digitalRead(sensor_pin) == 1){
		Log.info("****** DETECTED *******");
			// Send triggered message
			Log.info("Sent Message to Particle Cloud");
			Particle.publish("motion-detected");

			// Adjust this delay depending on timing POT on PIR sensor. Avoid sending 2 messages.
			// You could also poll sensor until low and "resetting" alarm.
			delay(10s);
	}
	else{
		Log.info("waiting...");
	}
}
If you have never programmed a Particle board before, you have many options. Probably the simplest of these is Particle’s Web IDE which is part of the Particle Cloud. You can code, build and flash your device all over the cloud.
In the code above, we start by defining the pin on the Photon 2 that is connected to the signal pin on the PIR motion sensor. In this case that is D6 but if you used a different pin then change that here. In the setup function, we set this pin as an input with a pulldown resistor.
In the main loop, we poll the status of the D6 pin every 2 seconds. If the pin is detected as high, we send a message or event to the Particle cloud using the “particle.publish” function which states that the motion sensor has been triggered. We then wait 10 seconds for the PIR motion sensor to reset.
Challenge: Instead of constantly polling the sensor, try using interrupts instead!
Raspberry Pi IoT Server Configuration
As previously explained, our Raspberry Pi IoT server will trigger a telegram message being sent to you. “Node-RED is a programming tool for wiring together hardware devices, APIs and online services in new and interesting ways”. A Node-Red flow will detect when a message has been sent from the Photon 2 device before triggering a message send function.
You can set up the Raspberry Pi Server by following this video:
Other Node-Red installations will work fine for this application. If you don’t have (or don’t want to run) Node-Red on a Raspberry Pi then you can run the service a number of different ways. Check out the Node-Red Getting Started documentation for more information.
Node-Red Flow
The Node-Red configuration requires you to install two libraries:
- node-red-contrib-particle-official
- node-red-contrib-telegrambot
To install these packages, open the “Manage palette” option from the main menu, or use the keyboard shortcut alt+shift+P. Select the install tab and search for the above packages. With these installed you are now ready to make your flow.
Particle Subscribe Node
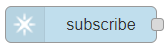
When creating a Node-Red flow, it is easy to think about how your application will function. We want this flow to be triggered by a message from the Photon 2 to the Particle cloud so we start here. Drag the particle subscribe node into your flow.
Double click on the subscribe node to open the node properties. Here you can give the flow a name but most importantly we need to add a Particle OAuth client to allow Node-Red to access the Particle Cloud.
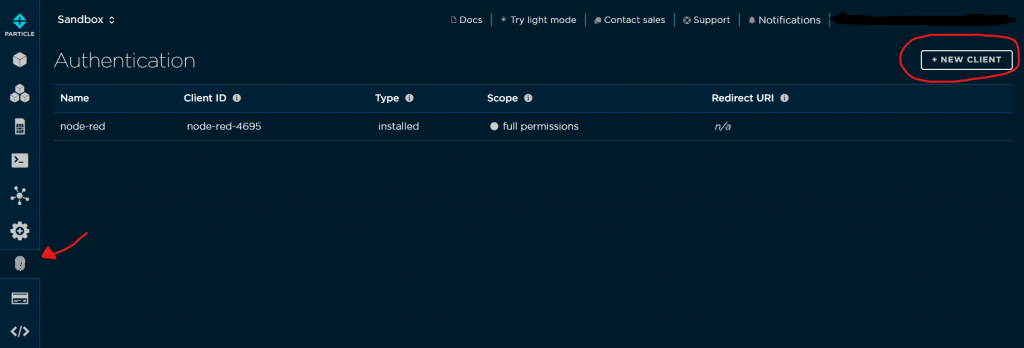
Open the Particle Cloud console at console.particle.io. In the left hand menu bar select “Authentication” and then create a new “Two-Legged Auth (Server)” client. Give your client a name and then note down the Id and the secret.
Back in Node-Red, copy these details into the particle-config properties by pressing the pencil icon. Once you have added the client Id and secret you can edit the rest of the subscribe node properties. Here you can filter messages from a specific device or event type. Once you have configured this node you can move on.
Function Node
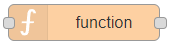
The function node will create a message that is sent further down the flow. In the function node, the following code should be put in the “On Message” tab. Obviously replacing TELEGRAM_CHAT_ID with the actual chat ID you want the message to be sent to. More on that in a moment.
msg.payload = {
    "type": "message",
    "chatId": "TELEGRAM_CHAT_ID",
    "content": "Alarm Triggered"
}

return msg;
Once you have configured the function node, join the left hand side of the function node with the right hand side of the Particle Subscribe node.
Telegram Send Node

The telegram send node is a little more complex than the previous two nodes, but don’t let that scare you! We have a straightforward video explaining how to setup Node-Red & telegram here:
Setup the telegram send node and telegram bot as shown in the video above. Once you have done that, connect the
Debug Node
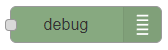
Use the debug node to monitor messages and debug your flow when you are operating the alarm. This node is completely optional.
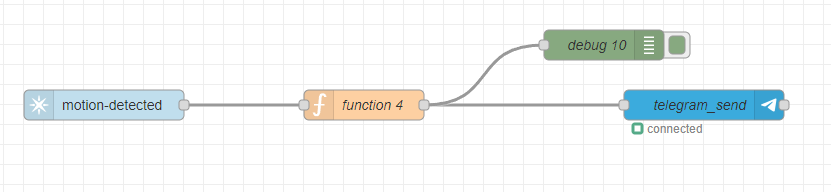
Now you are finished, your flow should look something like this:
When you are done setting up these nodes, then deploy your flow using the button in the top right of the window. Now test your alarm! When you trigger the alarm, you should get a telegram message!
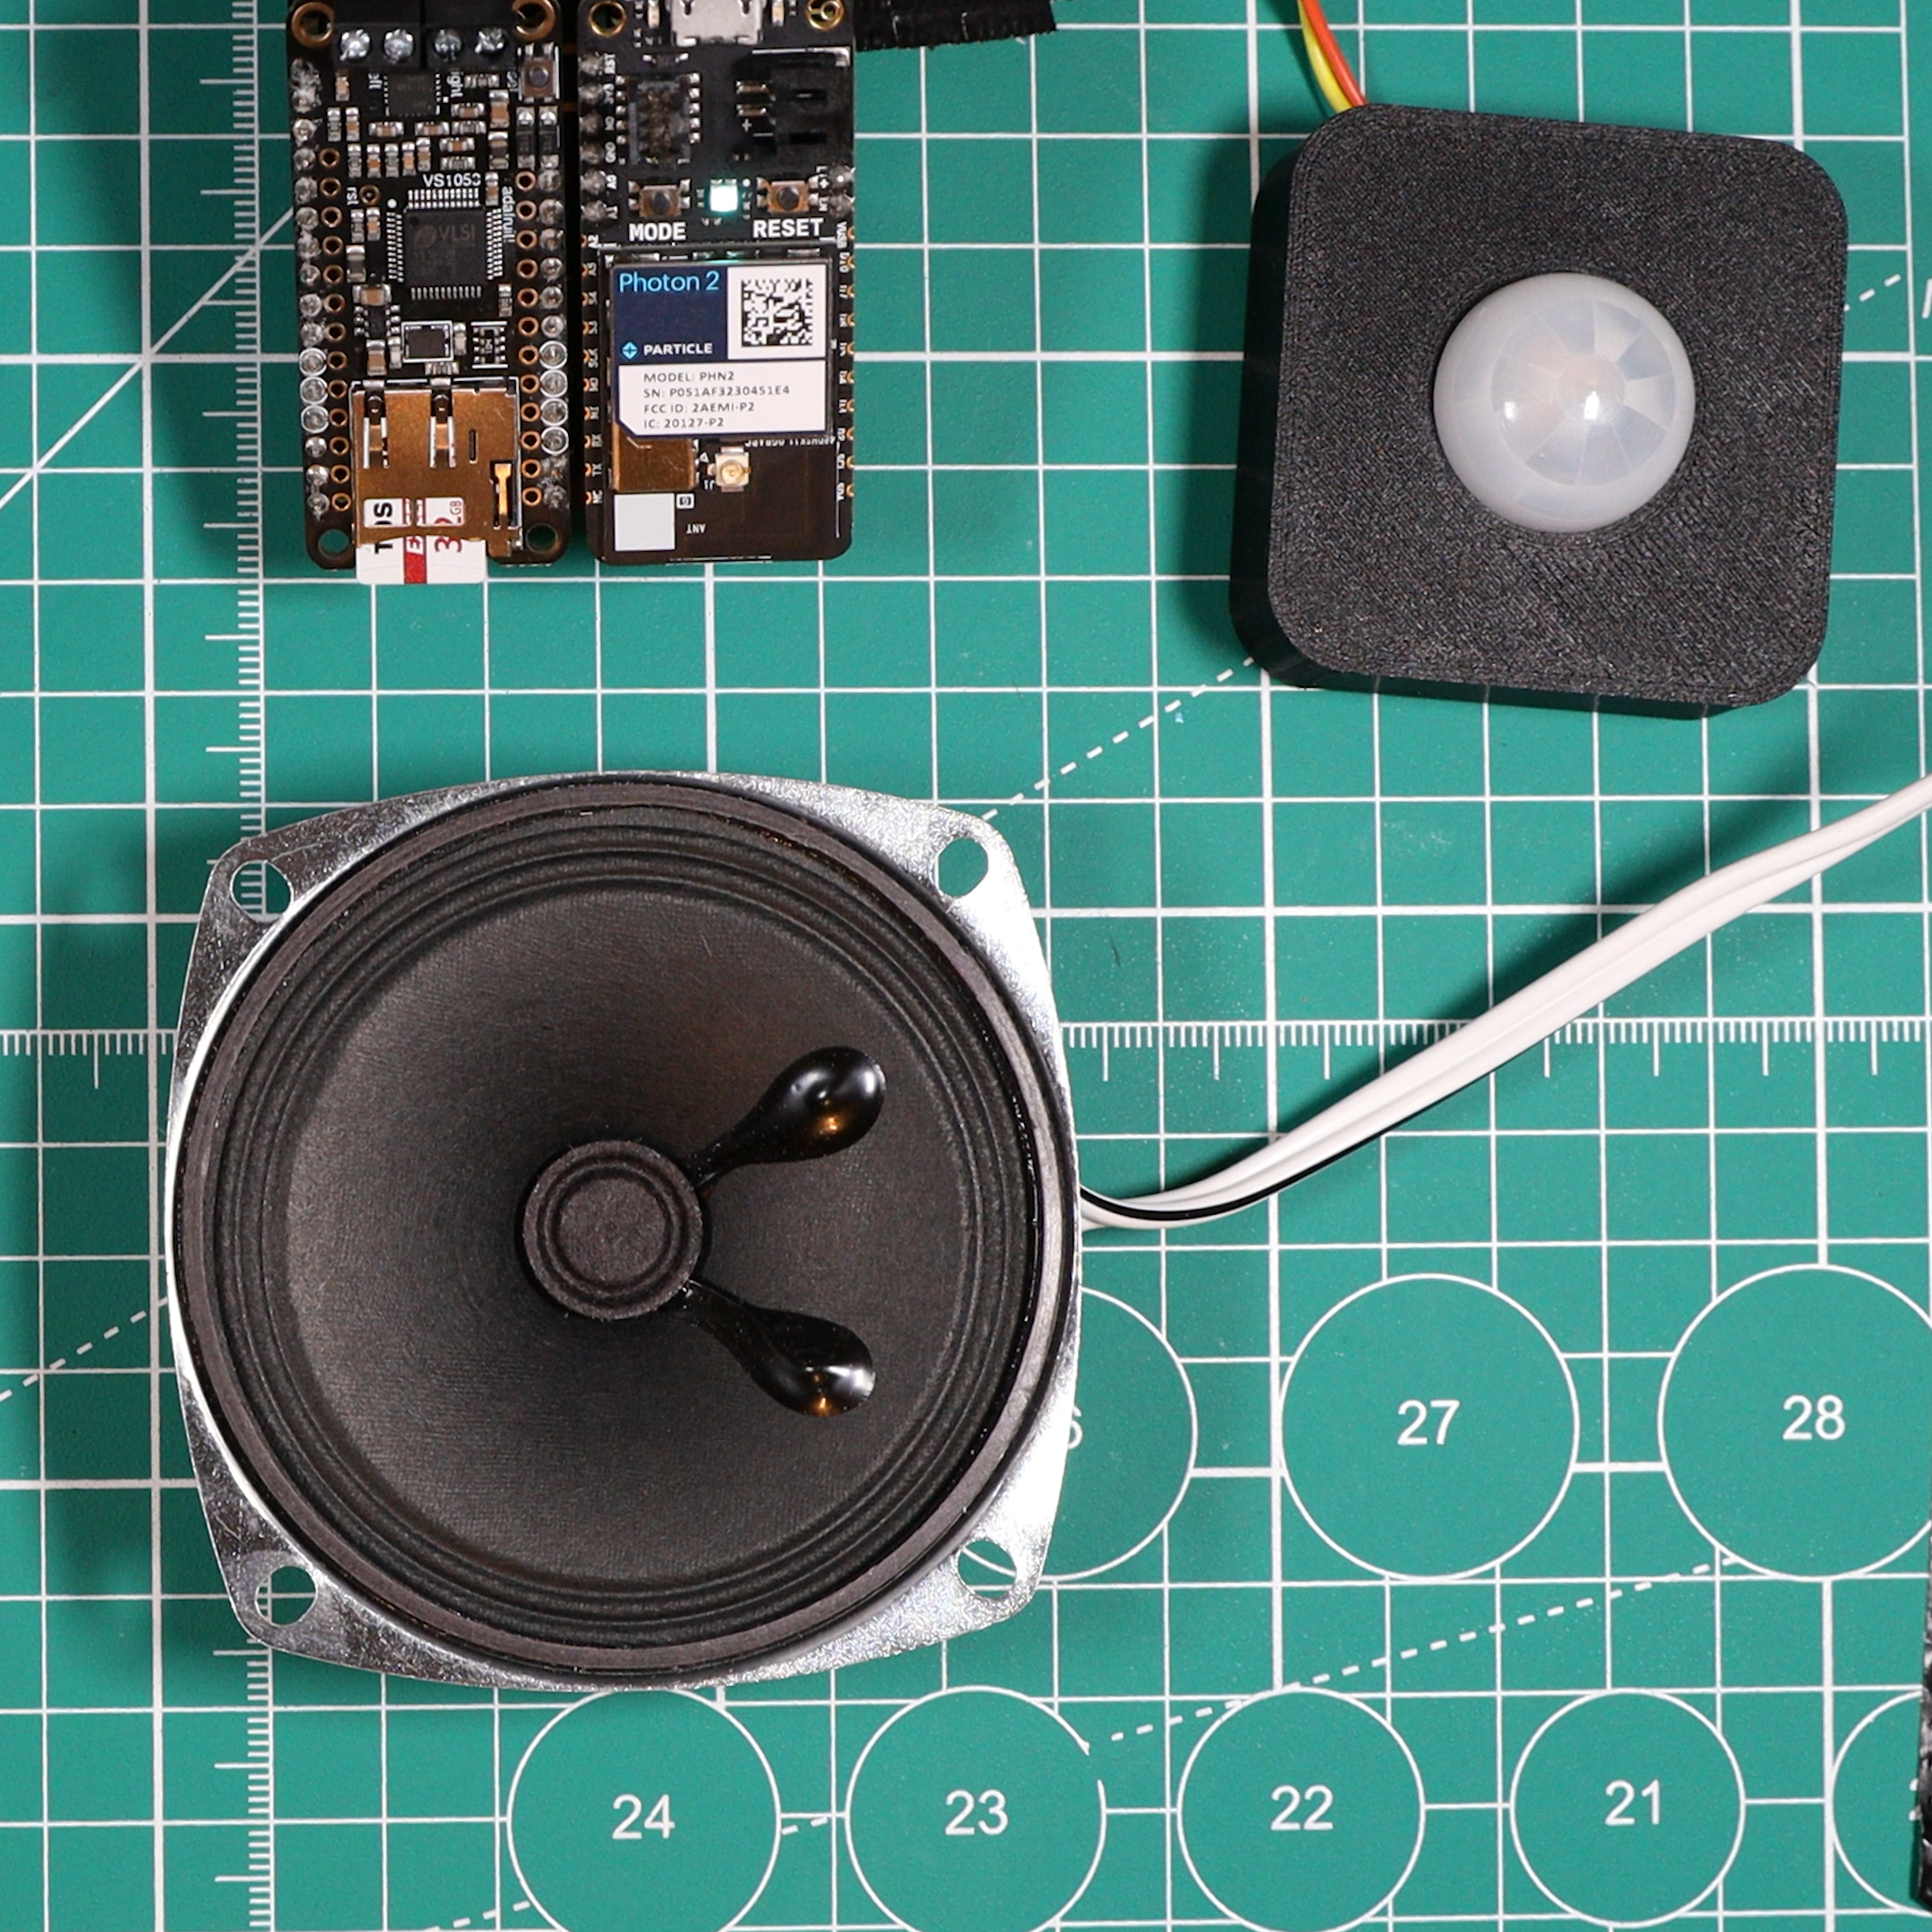
Adding Sound
Now that you have a functioning alarm system which will remotely alert you should an unsuspecting intruder trigger the alarm, you might want to add an actual audio alert.

For this we use an Adafruit Music Maker FeatherWing and a FeatherWing Doubler to connect the Photon 2. This is a handy extension platform as it means that we don’t need a breadboard anymore. I had to solder some speaker wire onto our 4 Ohm Speaker and then wired the speaker into one of the channels of the Music Maker. I used an overkill 32GB SD card in the Music Maker, but you can get away with a much smaller capacity, especially if you only want to play an alarm sound.
Now you should have all the hardware ready to go, lets have a look at the software. At the moment, there is nothing on the SD card, and we need to put a sound file on it. However, I am not going to put a sound file on it yet. Instead, I am going to use Particle’s asset OTA feature to bundle the sound file with the firmware when I flash the Photon 2. This basically means that if I want to change the sound that is played when the alarm is triggered, I don’t have to manually edit this file on the SD card and I can even update both the firmware and sound file remotely over the air.
Now lets move onto the code. This code is based on a mashup of the Particles Asset OTA examples here and here.
//
// This example stores bundled sound samples in an SD card for
// playback using the Adafruit Music Maker FeatherWing:
// https://www.adafruit.com/product/3436
//
// Original library: https://github.com/adafruit/Adafruit_VS1053_Library
// Ported for Particle by ScruffR
// Forked and ported: https://github.com/ScruffR/Adafruit_VS1053_Library
//
// This FW will create the following hierarchy in the microSD card:
// SD:
//  └─── samples
//        001.mp3
//        002.mp3
// optionally up to ...
//        998.mp3
//        999.mp3
//

#include "Particle.h"
#include "SdFat.h"
#include "Adafruit_VS1053.h"

const pin_t sensor_pin = D6;

SYSTEM_MODE(SEMI_AUTOMATIC);
SYSTEM_THREAD(ENABLED);

// In production code, you may prefer to use onAssetOta from STARTUP
// however see the note below in setup()
// STARTUP(System.onAssetOta(handleAssets));

SerialLogHandler traceLog(LOG_LEVEL_WARN, { { "app", LOG_LEVEL_INFO } });

SdFat SD;

// These are the pins used for the Music Maker FeatherWing
const int  MP3_RESET        = -1;                 // VS1053 reset pin (unused!)
const int  SD_CS            = D2;                 // SD Card chip select pin
const int  MP3_CS           = D3;                 // VS1053 chip select pin (output)
const int  DREQ             = D4;                 // VS1053 Data request, ideally an Interrupt pin
const int  MP3_DCS          = D5;                 // VS1053 Data/command select pin (output)
const char *fileNamePattern = "%03d.mp3";         // file name pattern to insert track number
Adafruit_VS1053_FilePlayer musicPlayer(MP3_RESET, MP3_CS, MP3_DCS, DREQ, SD_CS);

int trackNumber = 0;
bool needStart = false;

// This is the directory to hold the assets.
const char *const assetsDir = "/samples";

// Forward function declarations
void blink();
void handleAssets(spark::Vector<ApplicationAsset> assets);
int playTrack(String num);
int setVolume(String vol);
char str[2];

void setup()
{
    // This is just here to make it easier to see the early log messages on
    // the USB serial debug. You probably don't want this in production code.
    waitFor(Serial.isConnected, 10000); delay(2000);

    if (!SD.begin(SD_CS))
    {
        Log.error("SD failed or not present, entering Safe Mode");
        System.enterSafeMode();
    }
    Log.info("SD OK!");

    // This handles the assets. You can use the STARTUP method above, instead, but
    // when using STARTUP it's harder to see the debug log messages because they
    // occur too early.
    handleAssets(System.assetsAvailable());

    // Set current working directory
    SD.chdir(assetsDir, true);

    // List files
    SD.ls(&Serial, LS_R);

    // Initialise the music player
    Log.info("Adafruit VS1053 Library Test");
    if (!musicPlayer.begin())
    {
        Log.error("Couldn't find VS1053, entering Safe Mode");
        System.enterSafeMode();
    }
    Log.info("VS1053 found");

    // Make a tone to indicate VS1053 is working
    musicPlayer.sineTest(0x44, 200);

    pinMode(D7, OUTPUT);

    // DREQ must be on an interrupt pin.
    if (musicPlayer.useInterrupt(VS1053_FILEPLAYER_PIN_INT))
    {
        digitalWrite(D7, HIGH);
        musicPlayer.setIsrCallback(blink);
    }
    else Log.info("DREQ pin is not an interrupt pin");

    Particle.function("playTrack", playTrack);
    Particle.function("setVolume", setVolume);

    Particle.connect();

    pinMode(sensor_pin, INPUT);
  	pinMode(sensor_pin, INPUT_PULLDOWN);

	delay(2s);
}

void loop()
{
    // Wait for a command from the Cloud to start playing a track
    if (needStart && trackNumber)
    {
        char fileName[32];
        char msg[128];
        uint32_t us = micros();

        // Start playing a file, then we can do stuff while waiting for it to finish
        snprintf(fileName, sizeof(fileName), fileNamePattern, trackNumber);
        Log.trace("Starting: %lu", micros() - us); us = micros();

        if (musicPlayer.startPlayingFile(fileName))
        {
            Log.trace("Started: %lu", micros() - us); us = micros();
            snprintf(msg, sizeof(msg), "Started playing '%s'",fileName);
        }
        else
        {
            Log.trace("Not started: %lu", micros() - us); us = micros();
            snprintf(msg, sizeof(msg), "Could not open file '%s'",fileName);
        }
        Log.info(msg);
        needStart = false;
        delay(10s);
    }
    delay(2s);
	if(digitalRead(sensor_pin) == 1){
		Log.info("****** DETECTED *******");
		Log.info("Sent Message to Particle Cloud");
		Particle.publish("motion-detected");
        trackNumber = 1;
        needStart = 1;
	}
	else{
		Log.info("waiting...");
	}
}

void blink()
{
    digitalWriteFast(D7, !pinReadFast(D7));
}

void handleAssets(spark::Vector<ApplicationAsset> assets)
{
    if (assets.size() == 0) {
        Log.info("handleAssets called but no assets available");
        return;
    }

    Log.info("handleAssets called");

    if (SD.exists(assetsDir) == 0)
    {
        // Directory does not already exist
        SD.mkdir(assetsDir);
        Log.info("created assets dir %s", assetsDir);
    }

    for (auto &asset : assets)
    {
        File myFile;
        String path = String::format("%s/%s", assetsDir, asset.name().c_str());
        int size = (int)asset.size();

        Log.info("asset path=%s size=%d", path.c_str(), size);

        int assetExists = SD.exists(path.c_str());
        if (assetExists == 0)
        {
            // SD.open() with FILE_WRITE will create a file if it does not exist
            myFile = SD.open(path.c_str(), FILE_WRITE);
            if (myFile)
            {
                int amountRead = 0;
                char buf[512];

                while (amountRead < size)
                {
                    int count = size - amountRead;
                    if (count > (int)sizeof(buf))
                    {
                        count = (int)sizeof(buf);
                    }

                    count = asset.read(buf, count);
                    if (count <= 0)
                    {
                        break;
                    }
                    myFile.write(buf, count);
                    Log.info("wrote %d bytes to file", count);

                    amountRead += count;
                }
                // Always close files when you're done with them
                myFile.close();
                Log.info("Done writing");
            }
            else
            {
                Log.info("Unable to create file on SD %s", path.c_str());
            }

        }
        else
        {
            Log.info("File already exists, doing nothing");
        }
    }

    // Mark assets as handled so this won't be called again
    System.assetsHandled(true);
    Log.info("set assetsHandled to true");
}

// Usage: send a 3 over the Particle Console to start playing track 003.mp3
int playTrack(String num)
{
  int n = atoi(num);

  if (n > 0) {
    trackNumber = n;
    if (musicPlayer.playingMusic) {
      musicPlayer.stopPlaying();
    }
    needStart = true;
  }
  return trackNumber;
}

// Set volume for left, right channels. lower numbers == louder volume
int setVolume(String vol)
{
    int volume = atoi(vol);
    musicPlayer.setVolume(volume, volume);
    return volume;
}
In the above code, you can see that we have many more functions than previously. This is because we now have functions to handle the assets bundled with the firmware as well as the functions to configure the audio playing.
The setup function checks that all the required components can be communicated with (SD card, Music Maker etc) and does general setup such as configuring the sensor input pin and connecting to the Particle cloud. The handleAssets function is called in the setup function and is used to check if there are assets that need updating. If there is work for this function to do then it will un-pack those assets and store them on the SD card. There are two functions which control the sound production, these are playTrack and setVolume which are called in the main loop.
The main loop functions in much the same way as the previous example, however, when the alarm is triggered, an event is sent to the Particle cloud but also two conditions are set true (trackNumber and needStart). On the next iteration of the loop, the alarm track should be triggered.
For the assets to be correctly bundled with your firmware, you should store them in a directory in your project such as “assets” and make sure that in the project.properties configuration you have the line “assetOtaDir=assets”. I just used an mp3 alarm file from the YouTube sound library as my asset and stored it in the “assets” folder in my project.
Now if you go flash your Photon 2, the build process will take up a little more time than usual but the sound file will be compressed and bundled into the final build file and will be flashed with your program onto the Photon 2. Asset OTA is a fantastic feature if you have to update some assets remotely using the cloud flash function.
Conclusion
With the Photon 2 flashed with your code, you should have an alarm that will sound as well alerting you with a telegram message! We made use of the free Particle cloud to receive and process messages from the Photon 2 alongside a local IoT server that we have previously made.
If you are interested in getting yourself a Photon 2 you can pick one up here. Remember, Learn Embedded Systems readers get 20% off at the Particle store with code LEARNEMBEDDED.