This post will cover how to set up a Keil µVision project to enable you to program and debug your STM32F4 Discovery development board.
Step 1: Download and install the IDE, available at the Keil website here.
Step 2: Connect the Discovery board to your PC using a Mini USB cable. If this is the first time you have done this, it is likely that a series of drivers will be installed. Wait for this process to complete if required.
Step 3: Open Keil µVision. Navigate to “Project” then select “New µVision Project”. Create or navigate to a suitable folder for your project files then name your project and save.
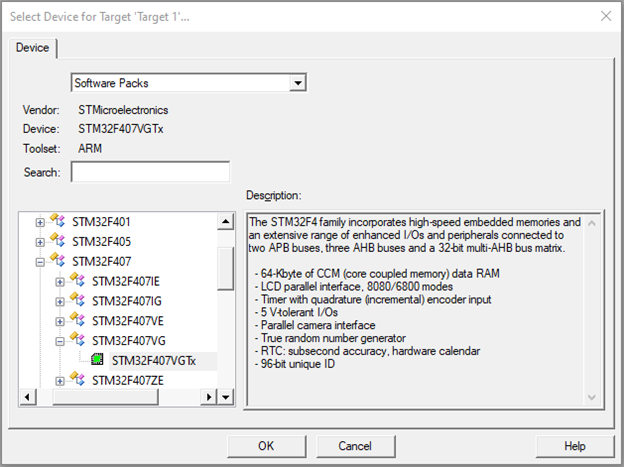
Step 4: In the “Select Device for Target” window that opens, search for and select the STM32F407VGTx device. Press “OK”.
Step 5: In the “Manage Run-Time Environment” Window that pops up, select STM32F4-Discovery in the Board Support drop down.

Step 6: Select the “CORE” check box under the “CMSIS” Section.

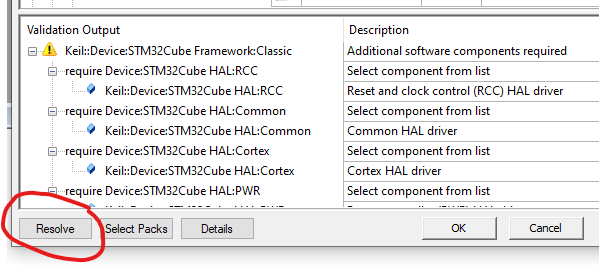
Step 7: Under the “Device” section, check the “Startup” box, under the “STM32Cube Framework (API)” section select “Classic”, press “Resolve” in the bottom left of the window. Under the “STM32Cube HAL” section select the drivers for any devices you will use if they are not already selected. Press “OK”.
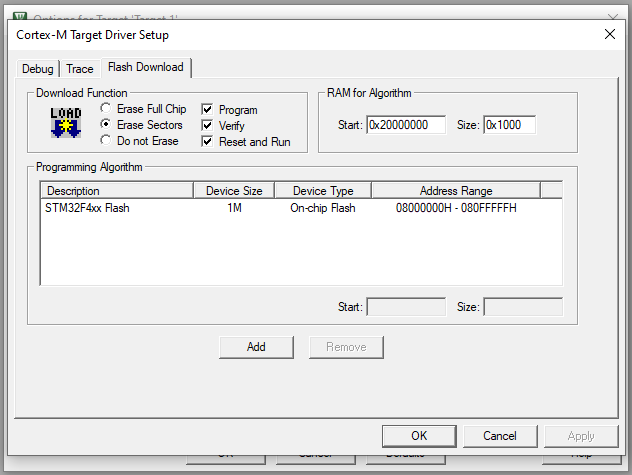
Step 8: Open the “Options for Target” window from the menu Project > Options for Target (or use the Alt+F7 shortcut). In the “Target” tab, set the Xtal to 8.0MHz. In the “C/C++” tab enter the following, without quotations, into the “Define” box: “USE_HAL_DRIVER”. In the same tab you should also ensure that the folder you created to house the project files is included in the “Include Paths” box. The folder can be added by pressing “…” then “New (Insert)” then “…” and navigating to the project folder, press “OK” twice to return to the options for target. In the “Debug” tab, use “ST-Link Debugger” if you are using the USB interface to program the discovery board. Open the settings for the ST-Link Debugger and select “SW” in the port drop-down on the “Debug” tab. On the “Flash Download” tab ensure the following settings are selected:
Step 9: Press “OK” to close the windows and you are now ready to program your STM32F4 Discovery! Check out some other posts here to learn how to program this board.
1 comment